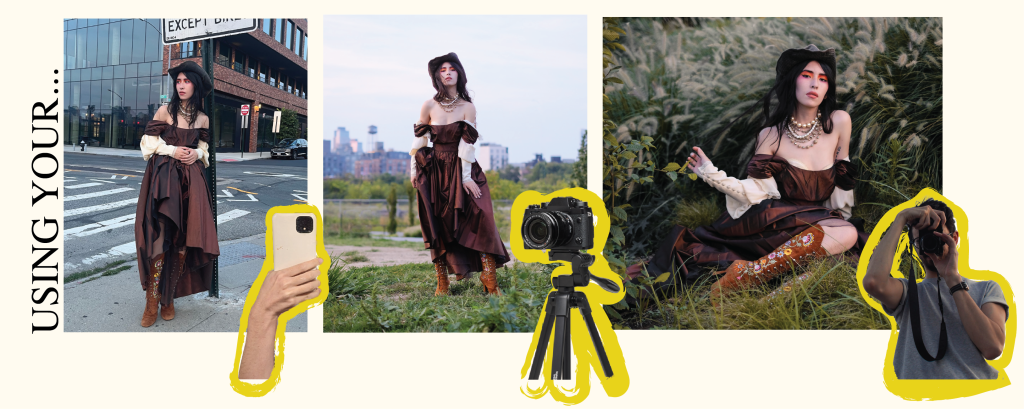
On your phone, on a camera, with self-timer, or with a friend, this is everything you need to know.
If you wear a great outfit and don’t post it online, did it even happen? This post is for anyone who has reached the point in their style journey where they want to take their outfits from the streets to social media, but don’t know where to start or need some guidance. From camera setup to posing, I’ll break down the core components of the perfect fit pic.
Self-timer (Phone):

My Phone: Google Pixel 4 XL
Pros: You always have your camera with you, easy to set up, most phones have high quality cameras on them so no expensive equipment required, people appreciate the naturalism of a phone photo.
Cons: Limited in-camera controls, no way to disable some automatic post-processing that the phone automatically applies, different look from camera photos (for better or for worse).
I don’t personally use a tripod when shooting on my phone, but I would recommend picking one up if this is your main method of shooting fit pics. Usually, I just lean my phone against my bag, a wall, or any heavy object, but I try to keep it as close to a 90-degree angle as possible. I like to set it up at waist height with a good allowance on the top and bottom of the frame and then crop in closer afterwards. I set my self-timer to 10 seconds just so I have time to compose myself for each shot before the shutter goes off.
Self-timer (Camera):

Pros: More freedom than using a photographer, more control over color, lenses, and other in-camera settings than using a phone.
Cons: Requires a tripod, can be difficult to adjust framing/focus by yourself, confines photos to one spot.
My Cameras: Fuji XT-3 with an X-series 35mm lens, Nikon D5300 with a 35mm lens
My Tripod: Velbon S-600
In general, I always shoot my fit pics with the camera between knee and torso height. I’m a little on the shorter side, so I like to have some extra length with a lower angle. If your camera allows, set up your frame by turning on the camera and flipping the display to the front, so you can simultaneously move around and see what the final shot will look like. You can also pair your phone to your camera to control the shutter from your hand no matter where you are, but I prefer just using self-timer so I can pose without having my hand on my phone (even if it’s discreetly placed in my pocket).
Shooting with autofocus is too unreliable for my tastes, so I usually set up my frame and then place an object (anything from a coin to one of my shoes) where I will be standing. I focus my camera on that object and mark where it was on the ground, and then go stand in that spot each time I start the self-timer. Alternatively, if you have a friend, roommate, or partner who you can focus on as a placeholder, it makes things a lot easier.
I like to set my self-timer at 10 seconds, taking 10 photos. This way you have enough time to get into frame and compose yourself and there’s a good amount of photos being taken with each batch so you can minimize running back and forth.
If you have space and you’re interested in constantly cataloging your looks, you can consider setting up a designated place in your house to take photos. You only have to do this setup once and then you can leave your tripod in place (although you will probably have to adjust your settings as the light changes day to day).
When someone else is taking your photo:

Pros: You’re no longer glued to one spot, so it’s easier to switch locations or change lighting. You can focus solely on posing and showing off your outfit while the photographer takes pictures! (As well as all the aforementioned benefits of using a camera).
Cons: Need to know a willing participant, less freedom of being able to take pictures whenever you want, and maybe some compromises in the interest of not making your loved ones take 100 photos of your outfit.
If you’ve found someone to volunteer to take your photos, chances are they already know what they’re doing. When my partner takes my photos I just show him the background I want, the angle I want him to shoot from, and I usually ask him to shoot in landscape rather than portrait to make it easier to crop for Instagram later. I’ll look over his shoulder at the pictures before we leave to make sure there’s a shot I like, but he always does a good job.
Since we both love fashion, taking fit pics of each other has actually become a fun part of our weekend routine. We usually get dressed, go do an activity, and then will wander around in the vicinity looking for a good place to snap a photo. It’s also helped us discover a lot of neighborhood spots we never would have stumbled across otherwise!
Lighting:
Lighting is probably the most important aspect of a fit pic besides the outfit itself. If you’re shooting outdoors, overcast days or around sunrise/sunset provide the most even lighting, with the harshest light being around midday. Unless you’re experienced with shooting in direct sunlight, I recommend finding a shady area to take your photos during that time, as it will be easier to balance your exposure and capture detail. If you have to choose between underexposing and overexposing, it’s always easier to fix an underexposed picture in post. You can’t add back details that have been blown out.

You also want to be mindful of where the light is coming from. In general, try to shoot so that your body faces the light. When you’re backlit, it’s easy to end up with a photo where the background is too light and the subject (you) is too dark. This is especially important if you’re wearing a lot of dark colors, as their details will get lost if the light doesn’t hit them.
I prefer taking my photos in natural light, but you can also take your pictures at night with a flash! Some photographers (like Denny Balmaceda @Denny623 on instagram) do this and it really makes the subject and their clothes pop from their darker surroundings.
Finding a good location:

When I’m walking around looking for a good place to take a photo, I’m mostly looking for three things:
- – A clean, uncomplicated background
- – Out of the way of pedestrians/ won’t block foot traffic
- – Colors that complement my outfit
Because I think of clothing like a character study, sometimes I look for specific locations to match the aesthetic of my outfit (e.g. a mid-century building for a classic menswear look or the beach for something inspired by Dune), but even I only do that if I have the luxury of time to location-scout.
Good places to take photos in your area might include:
- – A local park (unused basketball or tennis courts, outdoor racquetball courts, and fields are good spots)
– Your apartment or bedroom (show off your personality through more than your clothes!)
– In front of closed businesses or empty buildings
– On a hill or raised area with the sky as your backdrop
– The roof of your building or parking garage (if you have access)
Backgrounds to Avoid:

Backgrounds that are too busy/complicated
Although the atmosphere of your location can enhance the overall picture, you don’t want it to take away from the legibility of the subject. Locations that have too many things in the background, competing colors/textures/patterns, or loud graphics may be too distracting. Where I live, the most common example of a distracting background is a heavily graffitied wall or mural.
The other type of distracting background is one that creates a weird effect on your eyes, which can sometimes happen with small-scale patterns or tightly-spaced lines. Especially when the photo is downsized to Instagram or another mobile app, the lines make your eyes go funny. The most common example of this in NYC is the metal gates that roll over closed businesses, which initially seem like a great blank backdrop for a photo but are difficult to look at on screen.
Anywhere that obstructs the public or will bother other people
The most annoying thing you can do as a photographer is interfere with other people’s lives. Try to be respectful of public space and don’t shoot in areas where other people may be bothered. If you’re setting up a photo on the sidewalk, try to choose a street with very little foot traffic.
Backgrounds with personal information
Avoid taking photos that reveal your specific location, address, or other personal info. This also includes other people’s information: when taking photos by parked cars, censor license plates.
How to Pose:
If lighting is the most important part of taking a fit pic, then posing is probably the most intimidating, and I won’t pretend to be an expert on this facet at all. A lot of self-consciousness can come with taking pictures of yourself in public, and there are so many things to think about that by the time you actually get in front of the camera, the last thing you’re thinking about is standing so you can see how the pants break or turning your face towards the light.
If you feel you have trouble posing naturally, I recommend saving photos on Instagram, Pinterest, Tumblr, etc. of fit pics you like and try to recreate those poses your own photos. You can also practice in front of the mirror before you go out. It’s good to have a couple “go-to” poses in your back pocket. Mine are:

A detail shot is always a welcome addition!

Instagram accounts for inspiration:
- @_ppprincesss : a model who posts lots of reels with posing tips and inspiration!
@coco_pinkprincess : an incredibly fashionable kid who always has a great backdrop
@cityboi_shinn : great inspo for menswear
@hodanyousuf : inspiration for taking pictures on your phone + making reels
@smithstagram : poses with lots of personality!
I also recommend Jessica Kobeissi on YouTube, she’s a professional photographer who makes a lot of informative videos on taking a great portrait and breaks down everything from lighting, posing, and editing.
Post-processing Tips (optional)
There are nearly unlimited options for editing your photos, both on your phone and your computer, and it is by no means a requisite to use them. I never edit the photos I take on my phone save for some cropping, but I do use Adobe Lightroom to edit the pictures I take on my camera. I could make a guide solely about this step of the process, so I’ll keep it as brief as possible and just list the basic steps you can use to spruce up your photos without getting too deep in the weeds.

All of these steps are just for reference if you need them. You don’t have to take a professional-grade fit pic in order to post it online, you don’t have to worry about your white level or background noise or try to strike a pose that’s considered, but not too considered. The internet is a better place when we can build a community through hobbies like fashion, so the most important thing is just taking the step to share.

Leave a comment